This guide is no longer being updated. See our Catalina installation guide here
THINKPAD T430S MACOS MOJAVE 10.14 INSTALLATION GUIDE
- Important Wi-Fi considerations:
- Stock Wi-Fi cards in the T430s are not compatible with macOS
- The official T430s BIOS has a whitelist check that will prevent the system from starting if an unauthorized Wi-Fi card is installed in the internal Mini PCI Express slot
- The TP-Link TL-WN725N Wi-Fi USB adapter will work with the official BIOS whitelist.
macOS drivers for this Wi-Fi USB adapter are available here. Alternative drivers are available here. - Use the 1vyrain process to flash a modified BIOS if you prefer to install an internal Wi-Fi card
- Various other Mini PCIe and USB Wi-Fi adapters compatible with macOS are listed here
- See the guide here to dual-boot macOS and Windows.
- Please use our contact form if you find anything that isn’t accurate.
PART 1 OF 4: ADJUST BIOS SETTINGS
- Install the latest version of the official T430s BIOS available from Lenovo here.
Optional: Use the 1vyrain process to flash a modified BIOS to remove the WiFi whitelist and enable additional advanced settings
. - Press F1 at startup to adjust the BIOS settings as follows:
– Restart > Load Setup Defaults – OS Optimized Defaults > Disabled
– Config > Display > Graphics Device > Integrated Graphics (only necessary on units with NVIDIA Optimus)
– Config > Serial ATA (SATA) > SATA Controller Mode Option > AHCI
– Security > Secure Boot > Disabled
– Startup > UEFI/Legacy Boot > UEFI Only – CSM Support > No
.
PART 2 OF 4: CREATE USB INSTALLER
. - Download the Install macOS Mojave app from the App Store
- Insert an 8GB or larger USB disk
- Open Applications > Utilities > Disk Utility
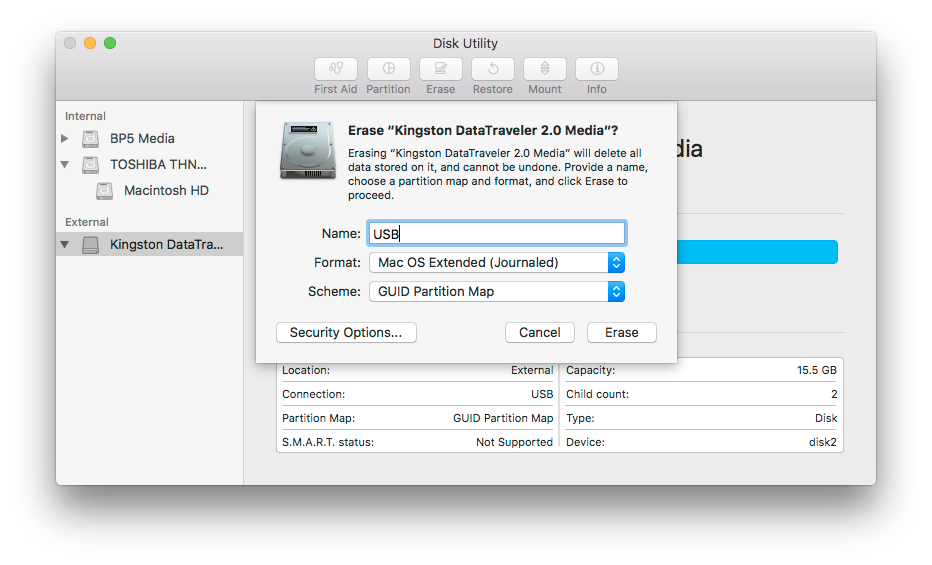
– Select the USB disk in the left pane (select the physical disk, not a volume on the disk)
– Click the Erase button
– Under Name: type USB
– Under Format: select Mac OS Extended (Journaled)
– Under Scheme select GUID Partition Map (If the Scheme option is not visible, go to the View menu and select Show All Devices)
– Click Erase
- Open Applications > Utilities > Terminal and enter the following command:
sudo /Applications/Install\ macOS\ Mojave.app/Contents/Resources/createinstallmedia --volume /Volumes/USB /Applications/Install\ macOS\ Mojave.app --no interaction
- Enter your password when prompted
- After approximately 25-35 minutes the process will finish and the USB will be renamed Install macOS Mojave (wait for the “copy complete” message in the Terminal before continuing)
- Download the ThinkPad T430s macOS 10.14 Utility and Kext Pack and place a copy on your installation USB
- Launch Clover Configurator from the Utility and Kext Pack and click Mount EFI
- Click the Mount Partition button to the right of the EFI partition of your USB. It will appear as EFI on Install macOS Mojave
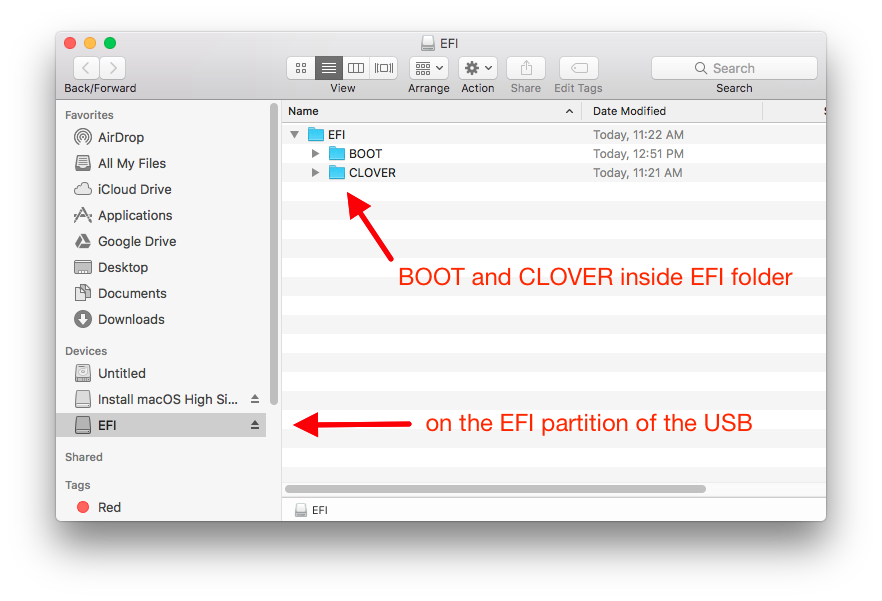
- Quit Clover Configurator and copy the entire EFI folder from the Utility and Kext Pack to the EFI partition of your USB, replacing the existing folder if present.
* If you have a T430s model with a 1366×768 display, replace the config.plist in EFI/CLOVER with the one contained in the 1366×786 config plist folder *
The EFI partition on your USB should now contain a single folder named EFI that contains two folders: BOOT and CLOVER. It should look like this:
- Eject your USB
.
PART 3 OF 4: INSTALL macOS MOJAVE
. - Disconnect any external monitors or other devices and place the USB installer in a USB port of your ThinkPad T430s. Press F12 at startup to select the USB as your boot disk
- Use the arrow keys to select Boot macOS Install from Install macOS Mojave at the Clover bootloader menu and press Enter
- From the macOS Utilities screen, launch Disk Utility
- In Disk Utility, click the View menu and select Show All Devices
- Select your target disk (select the physical disk, not a volume on the disk) and click Erase
- If the target disk is already in APFS format, or if multiple partitions exist, it may be necessary to click Partition and remove these partitions
- Some users have reported installation issues when more than one disk is installed (primary bay + mSATA). It may be necessary to temporarily remove any additional disks.
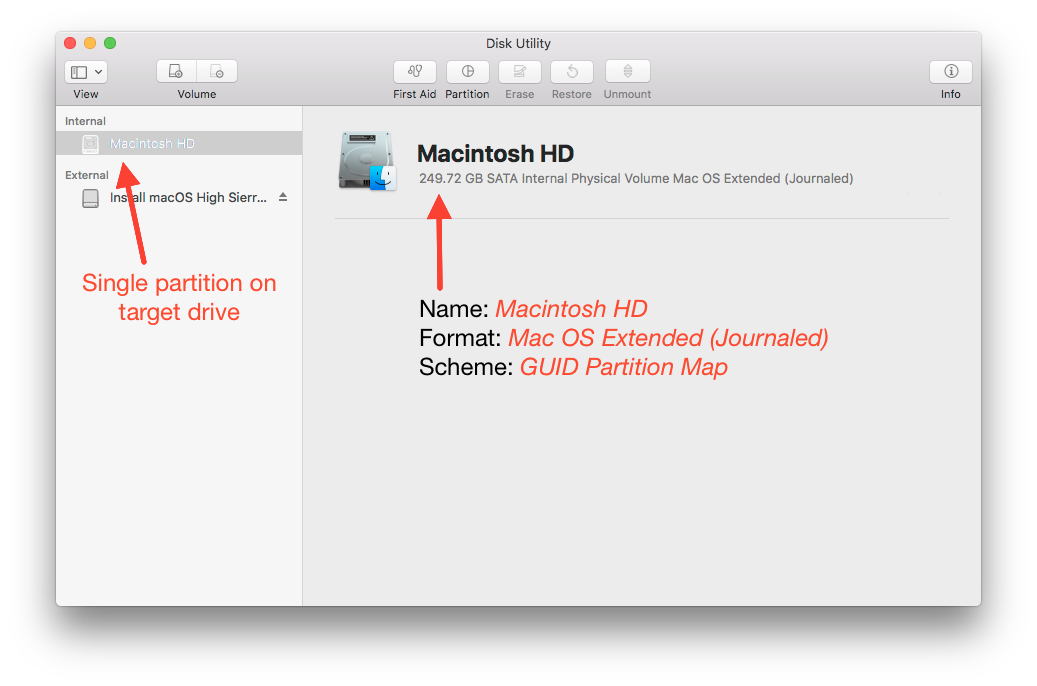
- You must end up with a single partition on the disk as described in the next step
- Name the target disk Macintosh HD, select Macintosh OS Extended (Journaled) format and GUID Partition Mapscheme, then click Erase
Do not select APFS format as this will prevent the installation from completing. The file system will automatically convert to APFS during the installation process if your target disk is a solid-state drive (SSD).
It should look like this:
- After the erase process finishes, quit Disk Utility, select Install macOS and follow the prompts to do a standard macOS installation on Macintosh HD
- The first stage of the install process should take about 5 to 10 minutes (if the screen dims you can press a key to wake it)
- The computer will restart at least once during the next stage. When it does, press F12 to ensure that it boots from the USB. At the Clover menu, select Boot macOS Install from Macintosh HD and press Enter to continue. The installation process will then continue very slowly and the screen may become distorted. The computer will eventually restart again. Press F12 to ensure that it boots from the USB.
- When Boot macOS from Macintosh HD appears on the Clover menu, select this entry and complete the guided macOS setup
.
PART 4 OF 4: POST INSTALL
. - Copy the Utility and Kext Pack to your Desktop and eject the USB installer
- Open Applications > Utilities > Terminal and enter the following command to allow apps from unidentified developers:
sudo spctl --master-disable
- Launch Clover Configurator from the Utility and Kext Pack and click Mount EFI
- Click the Mount Partition button to the right of the EFI partition of your hard drive. It will probably appear as EFI on APFS Container (Macintosh HD,Preboot,Recovery,VM)
- The EFI partition for Macintosh HD should now be mounted and show in the sidebar under Locations when you open a Finder window
- Quit Clover Configurator and copy the entire EFI folder from the Utility and Kext Pack to the EFI partition of Macintosh HD, replacing the existing folder if present (just as you did in step 12 for the installation USB).
- Confirm the installation USB has been removed and restart the computer
- Install any Mojave system updates available from Apple through Software Update and take a moment to read through the Notes and Suggestions section below
- Consider generating a unique serial number for your system using the guide here to avoid potential issues with Apple applications such as FaceTime and Messages
- Recommended additional steps to improve battery life with optimized CPU power management:
- Confirm that you have an active connection to the Internet
- Open Applications > Utilities > Terminal then copy and paste the following command in the Terminal window and hit Enter:
curl -o ~/ssdtPRGen.sh https://raw.githubusercontent.com/Piker-Alpha/ssdtPRGen.sh/master/ssdtPRGen.sh
- Next, paste this command in the Terminal window and hit Enter:
chmod +x ~/ssdtPRGen.sh
- Finally, paste this command in the Terminal window and hit Enter:
./ssdtPRGen.sh
- Answer ‘N’ to the questions about copying and opening the ssdt files
- A customized SSDT.aml for your specific machine will now be in the directory /Users/yourusername/Library/ssdtPRGen
- Copy the file named SSDT.aml to /Volumes/EFI/EFI/CLOVER/ACPI/patched/
(you may need to run Clover Configurator to mount the EFI partition) - Restart the computer


Notes and Suggestions
- General Suggestions
- If you encrypt your boot drive with FileVault it will be necessary install additional drivers from the latest Clover release here. Download the .pkg version of the installer, select Customize and then Clover for UEFI booting only. The necessary drivers are found under UEFI Drivers > FileVault 2 UEFI Drivers.
- Keep your installation USB on hand. After installing macOS system updates it is sometimes necessary to boot the system with the USB and re-install kexts to get everything working properly again.
- Use Clover Configurator if you need to mount the EFI partition
- If a kernel panic occurs, boot from the installation USB, select the installation drive, hit the space bar and select Safe Mode (-x) to successfully boot and make necessary changes.
- If Bluetooth is not available after waking from sleep, toggle the wireless radio switch on the right side of the computer off and then on again. To prevent this, the hibernatemode setting can be changed to mode 0 by entering the following command in Applications > Utilities > Terminal:
sudo pmset -a hibernatemode 0
- If System Information indicates no TRIM Support for your SSD, update your drive with the latest firmware and then enable TRIM by entering the following command in Applications > Utilities > Terminal:
sudo trimforce enable
- Touchpad and TrackPoint
- Turn off the touchpad with the <PrtSc> key if you will only be using the TrackPoint – this will prevent an issue with unintentional double-clicks with the TrackPoint buttons.
- Special Keys
- <PrtSc> toggles the touchpad on and off
- <Fn>+<F8> and <Fn>+<F9> keys adjust screen brightness
- <Insert> will eject the CD/DVD drive
- The <Windows> key functions as the macOS <Option> key
- <Alt> functions as the macOS <Command> key
- <Fn>+<F4> shuts down the computer
- Video / Displays
- If an external monitor is not automatically detected, open System Preferences > Displays and press the Option key (the <Windows> key on the T430s keyboard). This will show a Detect Displays button which should make the external monitor show up immediately.
- If Night Shift does not show up in the Displays preferences:
- Download and run Hackintool
- Select the Displays icon at top and note the Vendor ID and Product ID
- Launch Clover Configurator and open the Clover config.plist on your EFI partition
- Select the Graphics section
- Check the box next to Inject EDID
- Input the VendorID and ProductID shown in Hackintool
- Save your config.plist and restart the computer
- Miscellaneous
- Time Machine can be used to backup and restore your T430s. Complete the restore process by booting from the installation USB and repeating steps 24 – 27 (and optionally step 31) to restore the contents of the EFI partition.
- HWSensors provides a convenient way to monitor the status of your system from the menu bar
- Smart Scroll can be installed to enable middle-button TrackPoint scrolling even when the touchpad is disabled
- Ukelele or Karabiner-Elements can be installed to create customized keyboard layouts
- FruitJuice and coconutBattery provide convenient ways to monitor the health and status of your battery
- If the Bluetooth radio is turned off in Windows or Linux it may no longer show up when booting into macOS. Boot back into Windows or Linux to turn the Bluetooth radio back on.
- Battery life may be improved by disabling Intel Turbo Boost Technology with the kext available here
- Sources / Credits
- Not functioning
- SD Card reader
- Fingerprint reader
- VGA port
- Microphone mute button on top of keyboard

.
MACOS MOJAVE UPDATES
- macOS Mojave Supplemental Update 10.14.6 #2 (build 18G103) – installs with no issues. Install this update through Software Update and select macOS Install from Macintosh HD at the Clover menu after the first restart.
- If the update through Software Update does not work correctly, the installer can be downloaded here.
- If audio does not work, run Kext Utility to repair permissions and rebuild the boot cache.
- macOS Mojave Supplemental Update 10.14.6 (build 18G95 – released previously as build 18G87) – installs with no issues. Install this update through Software Update and select macOS Install from Macintosh HD at the Clover menu after the first two restarts.
- If the update through Software Update does not work correctly, the installer can be downloaded here.
- If audio does not work, run Kext Utility to repair permissions and rebuild the boot cache.
- macOS Mojave Update 10.14.6 (build 18G84) – installs with no issues. Install this update through Software Update and select macOS Install from Macintosh HD at the Clover menu after the first two restarts.
- If the update through Software Update does not work correctly, the installer can be downloaded here.
- If audio does not work, run Kext Utility to repair permissions and rebuild the boot cache.
- macOS Mojave Update 10.14.5 (build 18F132) – installs with no issues. Install this update through Software Update and select Boot Install from Macintosh HD at the Clover menu after the first two restarts.
- If the update through Software Update does not work correctly, the installer can be downloaded here.
- If audio does not work, run Kext Utility to repair permissions and rebuild the boot cache.
INSTALLATION GUIDE UPDATES
- 09/14/2019: Updated Utility and Kext Pack with improved version of config.plist for 1366×768 displays and new version of Clover Configurator (5.5.0.0)
- 05/12/2019: Added alternate config.plist to Utility and Kext Pack for models with 1366×768 displays
- 04/16/2019: Initial version of guide posted